핸드폰에서 게임을 하기 위해서는
터치 및 조이스틱이 원활히 구현이 되어야 한다.
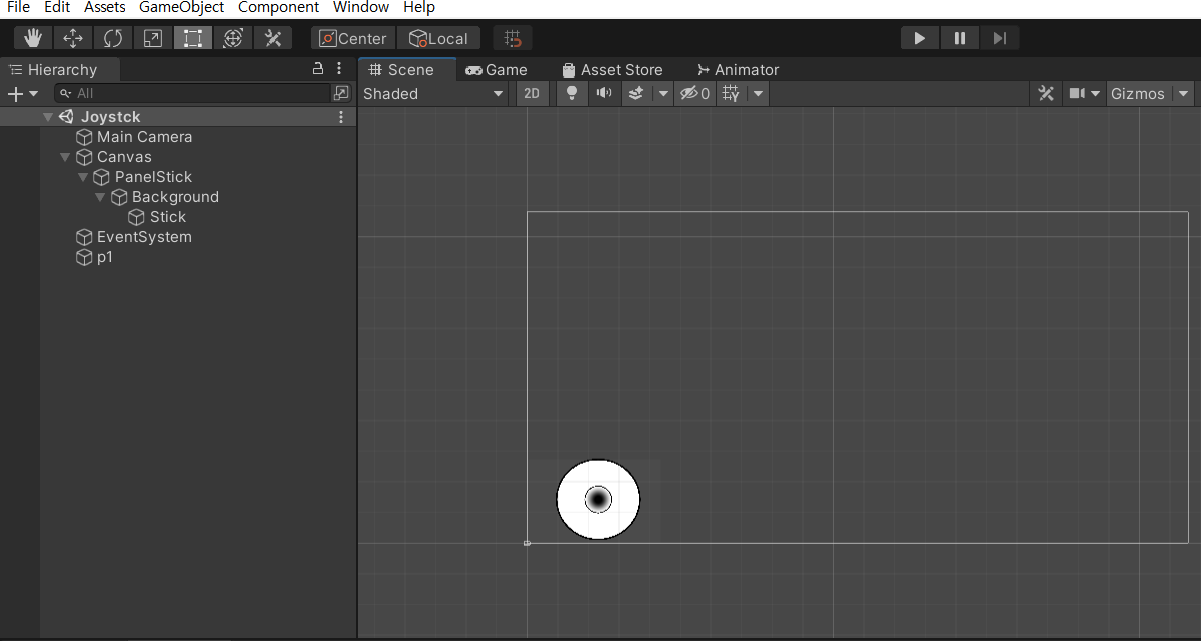
오늘은 조이스틱에 따라 모든 방향으로 이동이 가능한 동작을 구현해 본다.
1. UI 캔버스 로 조이스틱을 만들자.
2. 소스 구현 - 조이스틱
-조이스틱의 움직임을 담당한다.
|
1
2
3
4
5
6
7
8
9
10
11
12
13
14
15
16
17
18
19
20
21
22
23
24
25
26
27
28
29
30
31
32
33
34
35
36
37
38
39
40
41
42
43
44
45
46
47
48
49
50
51
52
53
54
55
56
57
58
59
60
61
62
63
64
65
66
67
68
69
70
71
72
73
74
75
76
77
78
79
80
81
82
83
84
85
|
using System.Collections;
using System.Collections.Generic;
using UnityEngine;
using UnityEngine.EventSystems; //마우스 및 터치 처리를 위한 라이브러리 추가
using UnityEngine.UI;
public class Joystick : MonoBehaviour , IDragHandler, IPointerUpHandler, IPointerDownHandler //마우스 관련 인테페이스 상속
{
Image background;
Image stick;
Vector3 InputDirection;
public float Horizontal()
{
return InputDirection.x;
}
public float Vertical()
{
return InputDirection.y;
}
public Vector3 Direction()
{
return InputDirection;
}
// 마우스 드래그 시 ( OnPointerDown()에서 지속적으로 호출됨)
public void OnDrag(PointerEventData eventData)
{
var rect = background.rectTransform;
var camera = eventData.pressEventCamera;//터치를 처리하는 카메라
var dataPos = eventData.position; //초기 터치 좌표
Vector2 pos;//현재의 터치 좌표
// 터치 위치가 Background 내부인지 체크하는 부분
if(RectTransformUtility.ScreenPointToLocalPointInRectangle(rect,dataPos,camera,out pos))
{
//pos를 Background의 크기에 대한 비율로 설정
pos.x = pos.x / background.rectTransform.sizeDelta.x * 2;
pos.y = pos.y / background.rectTransform.sizeDelta.y * 2;
//Vector 정규화 (-1.0 ~ 1.0으로 제한)
InputDirection = new Vector3(pos.x, pos.y, 0);
InputDirection = (InputDirection.magnitude > 1) ? InputDirection.normalized : InputDirection;
//Stick 이동 범위 설정.
float x = InputDirection.x * rect.sizeDelta.x * 0.4f;
float y = InputDirection.y * rect.sizeDelta.y * 0.4f;
//Stick 이미지 이동 좌표설정하기.
stick.rectTransform.anchoredPosition = new Vector3(x, y, 0);
}
//throw new System.NotImplementedException();
}
// 마우스 를 터치시
public void OnPointerDown(PointerEventData eventData)
{
OnDrag(eventData);
//throw new System.NotImplementedException();
}
// 마우스 를 땠을때
public void OnPointerUp(PointerEventData eventData)
{
InputDirection = Vector3.zero;
stick.rectTransform.anchoredPosition = InputDirection;
//throw new System.NotImplementedException();
}
// Start is called before the first frame update
void Start()
{
background = GetComponent<Image>(); // 백그라운드 이미지 찾기
// Stick 이미지 찾기
stick = transform.GetChild(0).GetComponent<Image>(); //this command is used because there is only one child in hierarchy
}
// Update is called once per frame
void Update()
{
}
}
|
cs |
2. 소스 구현 - 기체 움직임 (조이스틱 과 이동체 연결시키기)
|
1
2
3
4
5
6
7
8
9
10
11
12
13
14
15
16
17
18
19
20
21
22
23
24
25
26
27
28
29
30
31
32
33
34
35
36
37
38
39
40
41
42
43
44
45
46
|
using System.Collections;
using System.Collections.Generic;
using UnityEngine;
public class JetMove : MonoBehaviour
{
float moveSpeed = 9f;
GameObject panelStick;
Joystick stick;
private Vector3 direction;
private float xMin, xMax, yMin, yMax;
// Start is called before the first frame update
void Start()
{
// 기체 이미지 크기에 따라 X,Y축 사이즈를 지정한다.
xMax = 8.5f;
xMin = -8.5f;
yMax = 4.5f;
yMin = -4.5f;
panelStick = GameObject.Find("PanelStick");
panelStick.SetActive(true);
// Background에 연결된 Joystick 스크립트 연결하기
stick = panelStick.transform.GetChild(0).GetComponent<Joystick>();
// Debug.Log("direction.x = " + direction.x);
}
// Update is called once per frame
void FixedUpdate()
{
// 방향 얻어오기
direction = stick.Direction();
direction*= moveSpeed;
if (direction.magnitude != 0)
{
Debug.Log("direction.x" + direction.x);
Debug.Log("direction.y" + direction.y);
transform.position = direction;
//기체가 화면을 넘어가지 않도록 조정한다. transform.position = new Vector3(Mathf.Clamp(transform.position.x, xMin, xMax), Mathf.Clamp(transform.position.y, yMin, yMax), 0f);//to restric movement of player
}
}
}
|
cs |
하기 코드로 Joystick 의 방향을 벡터값을 얻어올수 있기에
stick.Direction() 이를 활용하면 조이스틱 대비 좌표점 이동 및
일정방향으로 X 혹은 Y축 등으로의 속도를 만들어 낼 수 있다.
혼자서 삽질을 해보다가 이렇게 만들어 내 봅니다.
감사합니다. ^^
반응형
'앱 만들기 > 유니티2D' 카테고리의 다른 글
| 유니티 스마트 폰 터치로 물체 움직이기 (2) | 2021.07.25 |
|---|---|
| 유니티-안드로이드 빌드 세팅하기. (2) | 2021.07.15 |
| 유니티 - Standrad Assets 2018.4 버전 컴파일 에러 발생시 (2) | 2021.07.08 |
| 유니티-8방향으로 총알을 발사하다. (1) | 2021.07.01 |
| 유니티-스프라이트 변경하기. (2) | 2021.06.30 |

댓글